- Challenge Information
- Key provider
- ISO file
- Mounting the ISO
- Unpacking the binary
- Reversing the binary
- Recovering the key
Challenge Information
- Challenge type: Reverse
- Rating: Medium 25 hours
- Challenge inputs:
- an official keepass binary
- a keepass key provider
- a keepass encrypted database of passwords
- an ISO file
Key provider
Conventionally, one would open a Keepass database by entering a password in the GUI. But there’s an alternate method if you want to move your password to a secure location like a smartcard: using key providers. Key providers are plugins in the form of a shared library, in our case a DLL file, that will programatically get the password from about any source you can imagine.
Opening the challenge’s KeyProvider in Ghidra gives us the following:
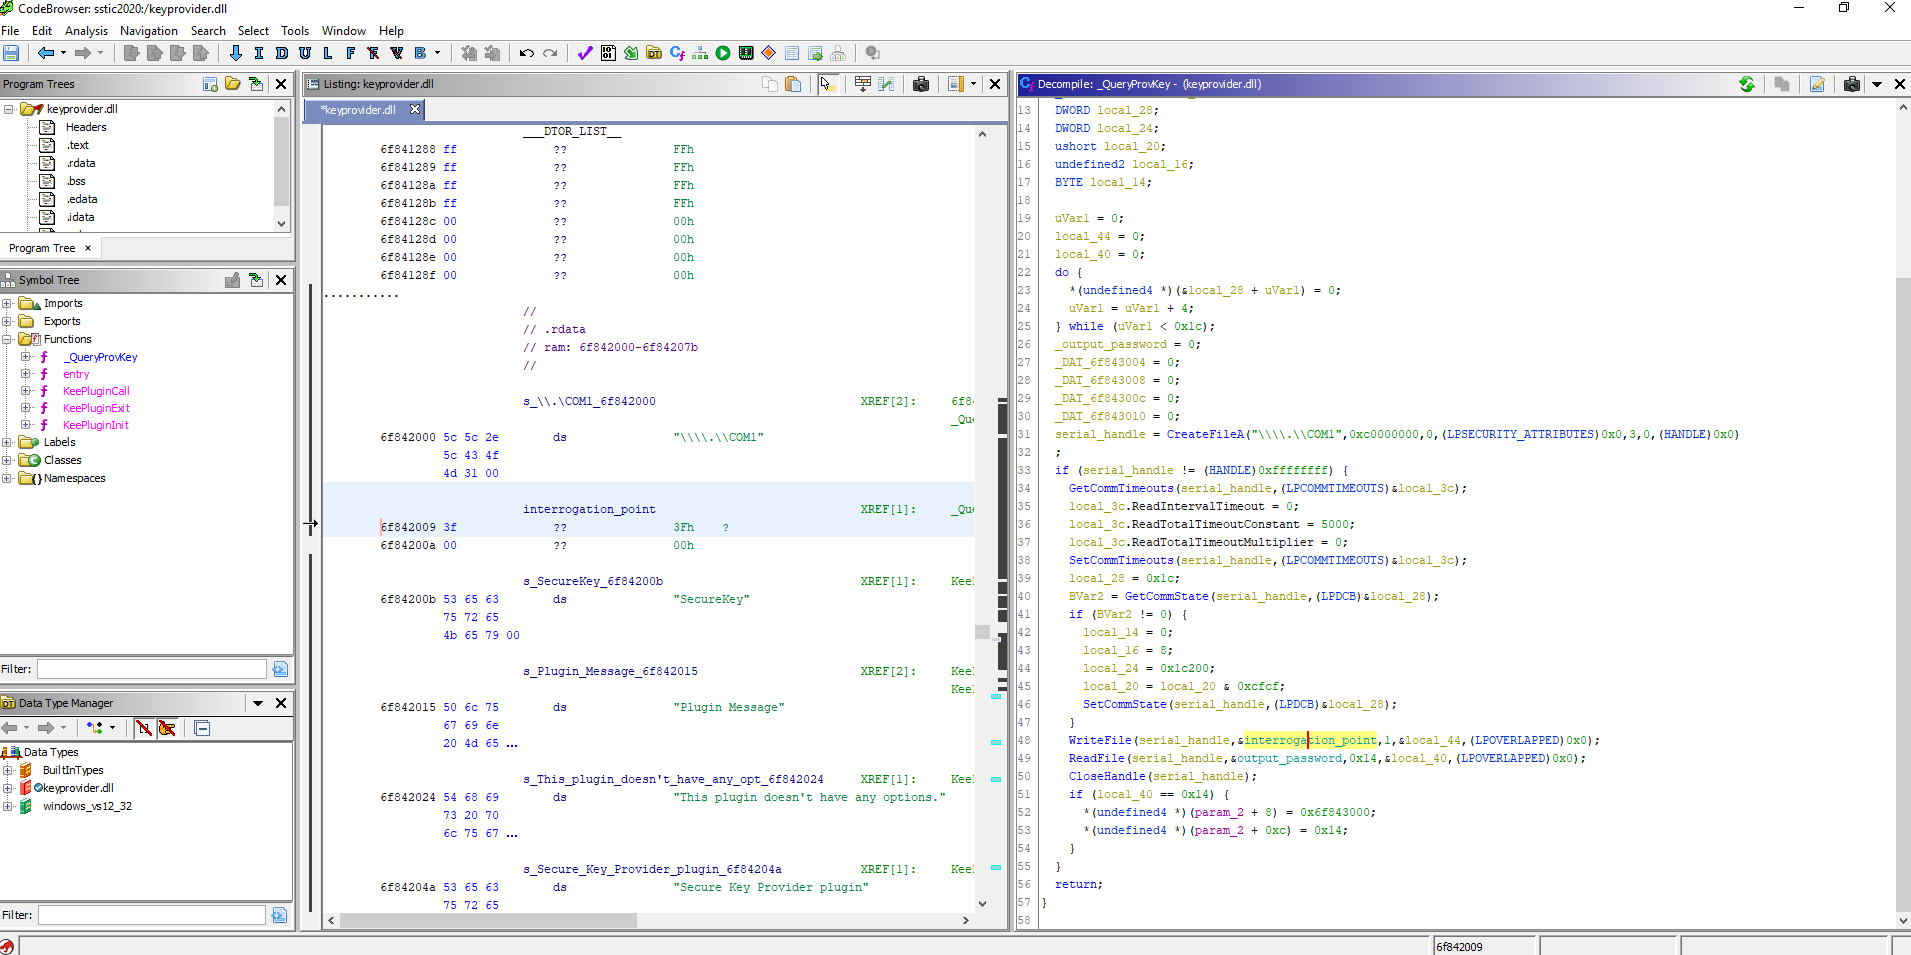
The key provider talks to a serial peripheral on port COM1. When sent the single char '?' it will answer a 20-bytes password that will be used to open the keepass database.
Nothing more to see here, so let’s move to the ISO file.
ISO file
Let’s run strings on it:
MAIN.EXE;1
SYSTEM.CNF;1
BOOT=cdrom:\MAIN.EXE;1
TCB=4
EVENT=10
STACK=801FFFF0
PS-X EXE
Googling these strings seem to indicate that the ISO file is a playstation disk!
Mounting the ISO
Finding a working and convenient emulator/debugger was a very very boring task. The cracking scene is riddled with crappy tools that barely work and some of which are probably malware. I tested a lot of tools until I finally settled on the debugger/emulator no$psx. To my knowledge, this is the only acceptable option. And take look at this awesome documentation!!
For static analysis I wanted to properly extract the MAIN.EXE file from the ISO, but it failed to mount. That’s because PSX ISOs are not regular ISOs. This took me a while to do on Windows but I finally managed using fisgon.
Afterwards I was told there’s an easier way to do it using iat:
iat screensaver.iso > screensaver2.iso
Oh well. This is my number 1 loss of time on this challenge: finding the appropriate tools. This took more than a day and was very frustrating. I’d have more than halved my time on this challenge had I started directly with no$psx and stuck to it.
Unpacking the binary
I opened the binary aaaaaaand … it’s packed! I tried to statically follow the assembly to understand what was happening but it soon seemed like too much effort. So I just grabbed the jump address and went on my merry way to a dynamic approach.
Afterwards I was told this is a simple UPX executable from which the UPX! strings had been removed. Note to myself: learn to manually unpack UPX, as it becomes more and more common in CTFs.
I just placed a breakpoint at the RAM jump address gathered statically and ran the binary in no$psx. The when it got to this address, I dumped the whole RAM range and imported it in Ghidra. This is easily said but still took a while to get familiar with the breaking process in no$psx and its dumping mechanism.
Notes on reversing MIPS
I wasn’t familiar with the architecture, but it’s actually fairly readable. There are a few things to know when reversing MIPS binaries:
- the most used calling convention uses
$a0to$a3to pass arguments, the rest are passed on the stack - the
jalinstruction is used to call functions - the callee returns using
jr $ra - the return values are stored in
$v0and optionally$v1 - MIPS uses a very strange dual pipeline which can result in instructions being out-of-order in the assembly listing when a call is made

Here, temporally, $a0, $a1 and $a2 are set before function_with_3_args is called. Due to the pipeline mechanism, the load immediate $a2 appears out of order in the assembly.
That’s basically all you need to know to start reversing MIPS :)
Reversing the binary
This program isn’t too big but when reversing I like to start with what I know the program should do. From looking at the keyprovider earlier, we know that some serial stuff will be involved: we will receive a one-byte input '?' and answer a 20-byte password. In the playstation’s memory layout specification, we get the serial port base address: 0x1F801050. So let’s first find that value in the binary and find functions which reference it. Bingo, this brings us in a function that seems to perform some action (init/read/write) depending on a parameter:
This portion to write a byte:
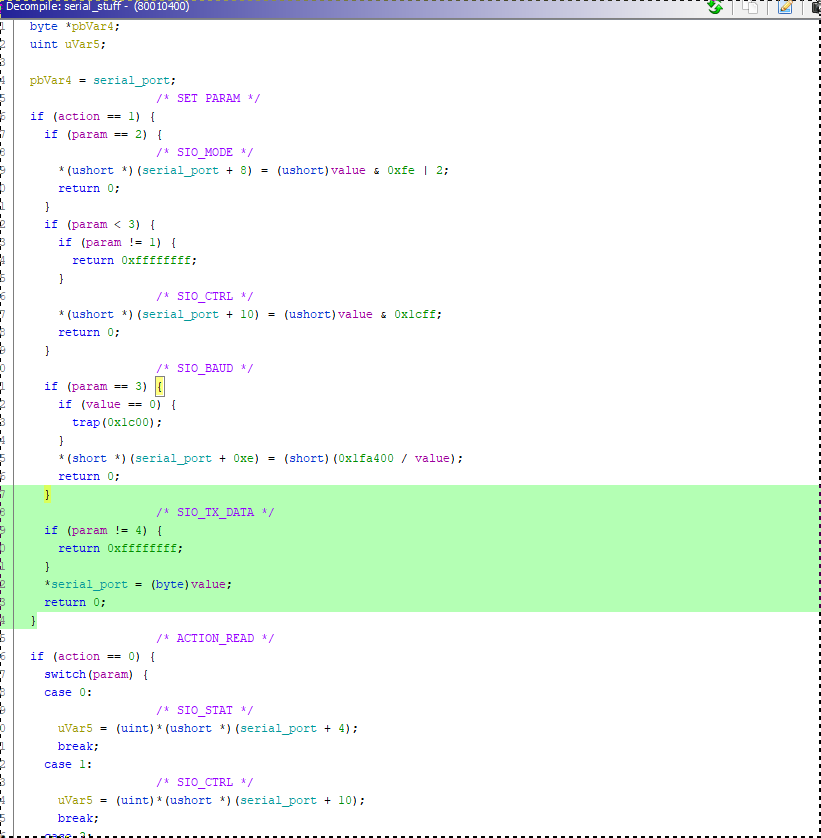
This portion to read a byte:

The caller to this function seems to be our main function, as everything’s placed in a while() loop:
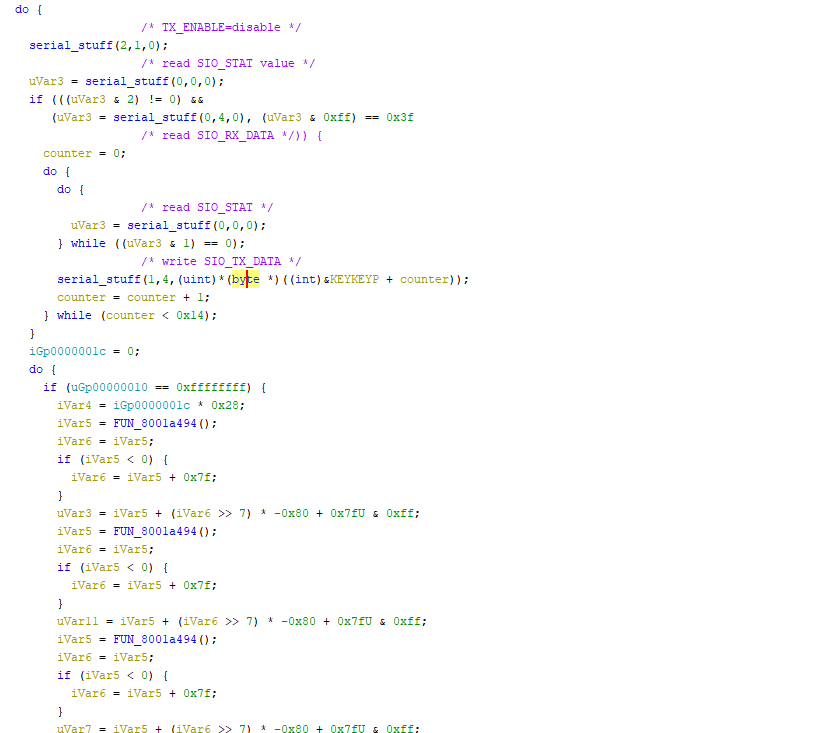
At the very top of the loop, we can observe that the program will check whether there is incoming data on the serial port. If so, it will read one byte, compare it to '?' and if it matches will then send 20 bytes of a memory address on the stack back to the serial port.
At this point I thought I had finished the challenge, so I emulated sending the '?' byte in the debugger and got a key which I tried … and it failed. There had to be more to this challenge :(
So I took a look at the rest of the loop and there were a bunch of magic numbers:
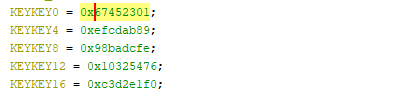
These are nothing-up-my-sleeve numbers commonly found in crypto. Oh noes, not again!
I traced these to the SHA1 and RIPEMD algorithms, which matched the expected output length.
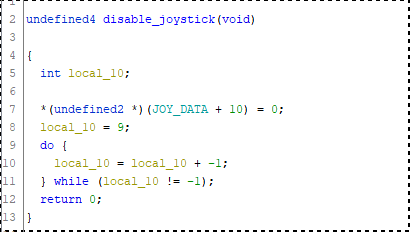
But I was somehow stuck on the possible user inputs of this challenge for a while because i’m pretty sure this code disables the joystick and that’s the only input I could think of:
Looking at the flow graph is oftentimes more revealing than the decompiled output which was absolute garbage here:
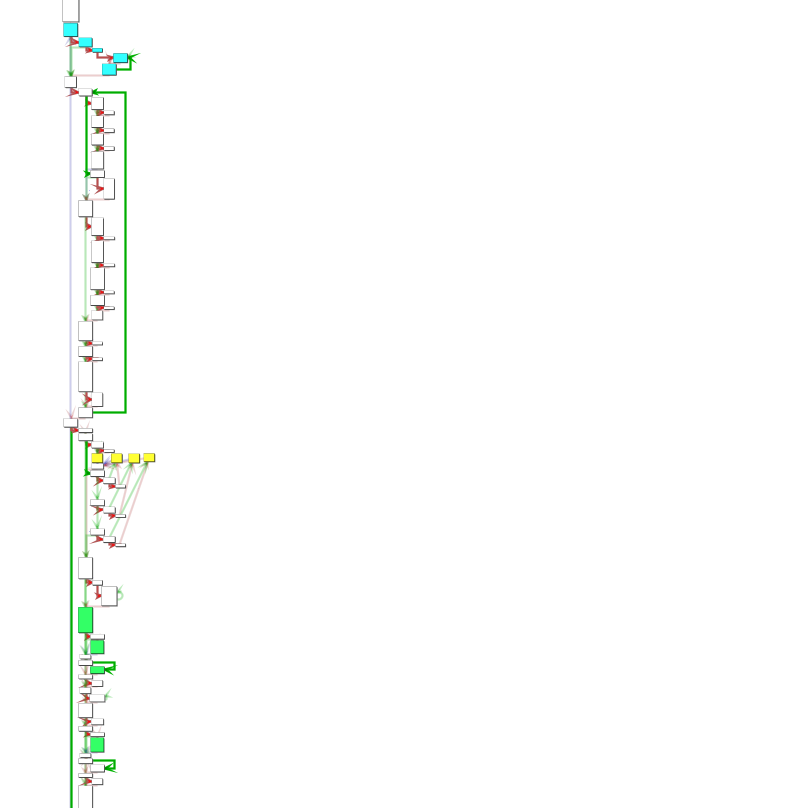
We can see our serial operations at the top of the main loop (colored in blue), but then there’s an interesting section which (in yellow) that I’ve reorganized to make it clearer:
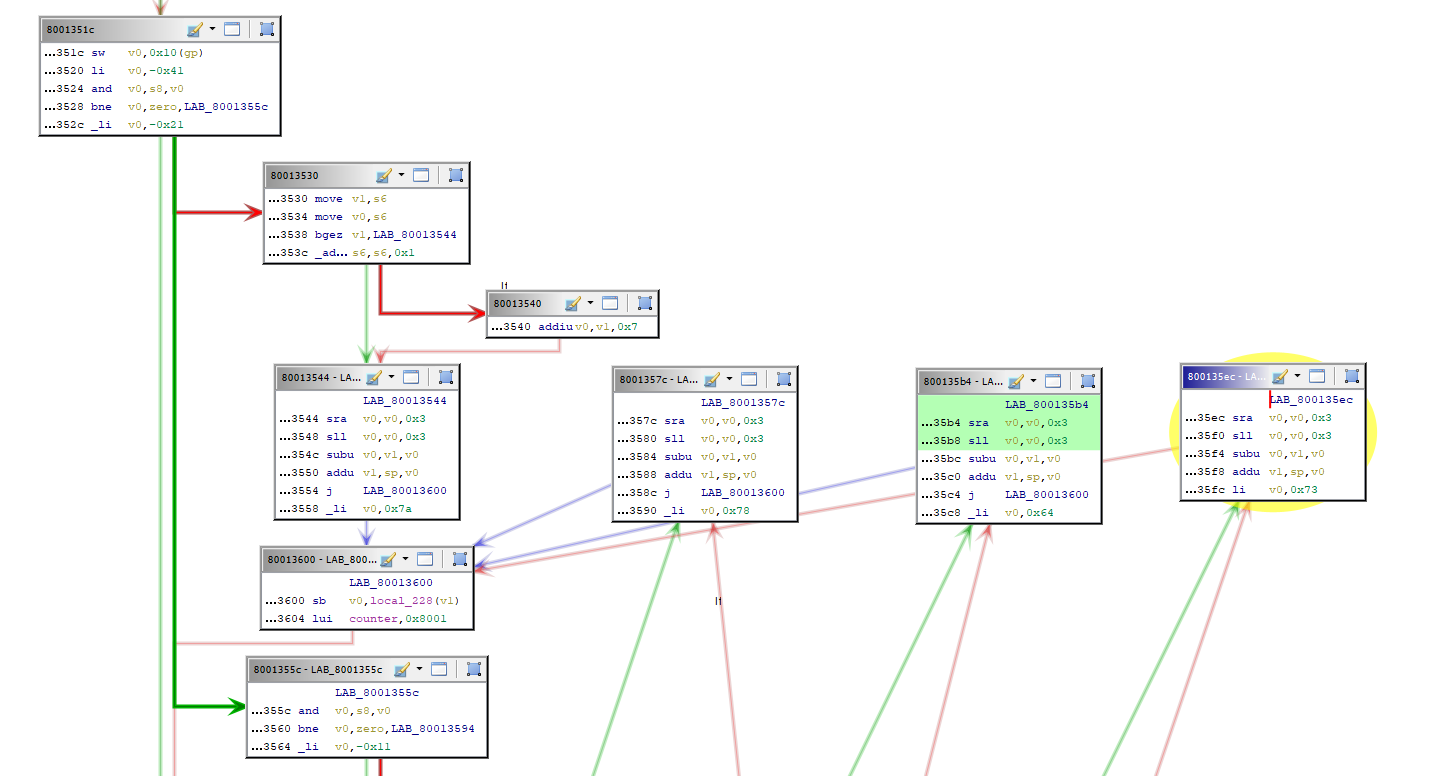
These constants … 0x7a = ‘z’, 0x78 = ‘x’, 0x64 = ‘d’, 0x73 = ‘s’ … they’re strangely familiar… It took a while to click but these are the keyboard emulation values of the playstation’s main 4 buttons. They correspond to square, circle, cross and triangle.
When mashing these keys in the emulator I noticed that they would be added to a circular buffer of 8 bytes and that my output password was updated. So we’re looking at 4^8 input key possibilities to recover the database password, couldn’t do it by hand.
The algorithm looked RIPEMD160 but I couldn’t immediately replicate its results, so I just pulled the decompiled algorithm from Ghidra and called it a day. The algorithm is replicated here (warning: extremely ugly).
Recovering the key
I used John the Ripper’s keepass2john feature to get a hash from the keepass database.
Then I generated all 65536 key candidates in hashcat’s $HEX[] format and fed these to hashcat against the keepass’ hash:
keepass2john keepass.kdb > keepass.hash
hashcat64.bin -m 13400 keepass.hash candidates.txt
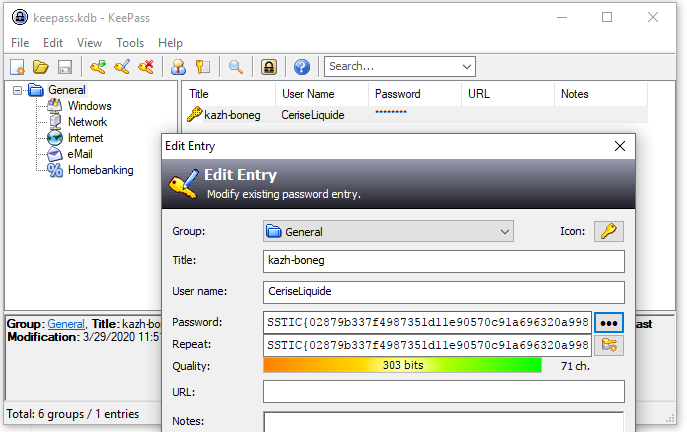
With the key to the database I could finally crack it open and I got the password to CeriseLiquide’s Megolm key:
Next part: step 6